
Reels are short, fun videos that can combine effects, filters, music, and a lot more. It’s noticed that this feature has upped engagement for a lot of Individuals, Instagram creators and business accounts.
Keeping your Instagram account active and engaging is the best way to grow your account.
Let’s look at the 7 easy steps to making a Reel using all the features available on Instagram’s native app!
Step 1
To begin with, you can fire the Instagram app on your mobile device and then-
- Tap the reel icon (
) at the bottom and then tap the camera icon at the top left corner of your Instagram home feed.
- The other way to get started is to tap the plus icon (
) at the top, then scroll to the third option, Reels at the bottom.
- You can record a clip by tapping (long press) on the (
- On the left, you’ll see a list of tools.
- The first one is the time limit where you can choose the reel to either be 15 seconds or 30 seconds.
Instagram has also looked at increasing this to 60 seconds and they’ll roll it out for all users soon. - Next is the audio tool where you can choose a song to use for your video.
All you have to do is scroll through the featured tracks or use the search bar to find something specific. Once you pick your favorite track, you can tap the play button to hear a preview of a song.
Then, tap the song to add it to your video. - You can choose what part of the track you want to use with the slider key.
Then tap Done.
Step 2
The next tool is Speed. This feature allows you to make your video play faster or slower.
You can choose from the following speeds-
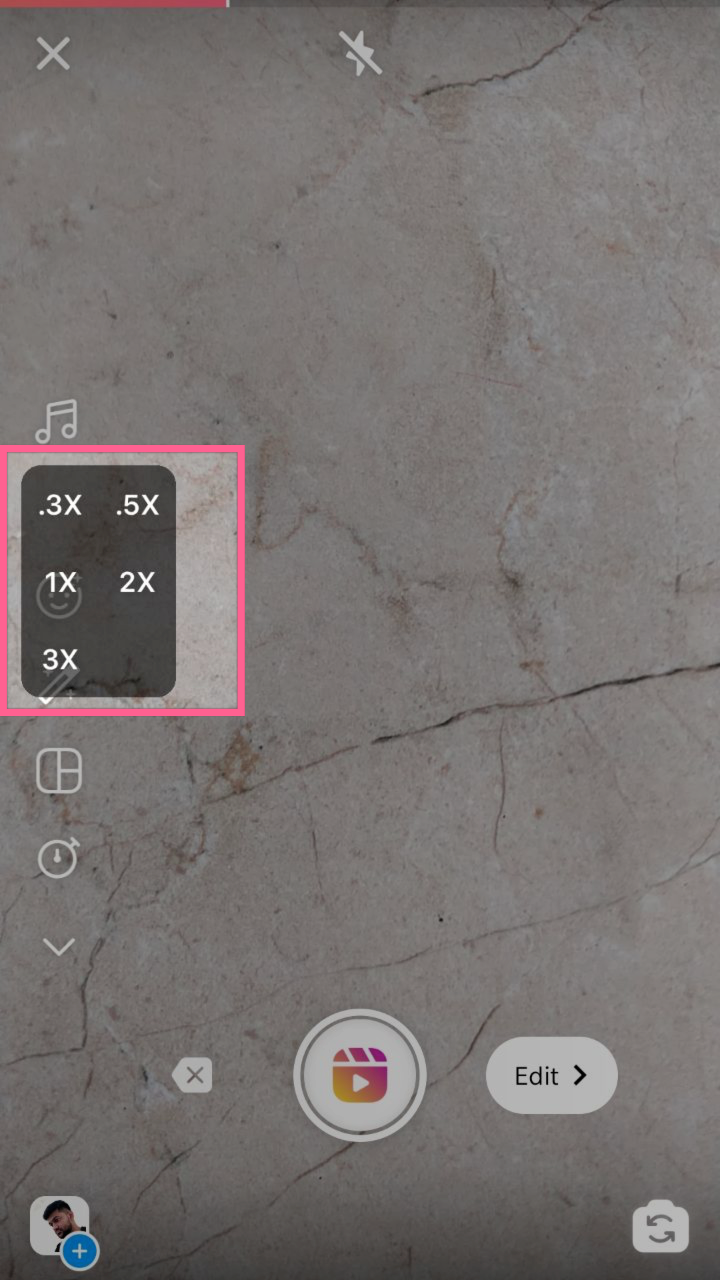
When you select the audio, you can adjust the speed of the video to ensure they sync well.
In case the video clip is fast, you can choose to slow it down and vice versa by choosing from the different speed options.
Step 3
The next tool is Effects. Here you’ll find hundreds of filters, effects, and a lot more to make your reel stand out!
All you have to do is scroll through the menu at the bottom to check out your options, select any one, tap on the “Use Effect” option and it’ll apply to your screen for you to record the Reel with the chosen effect.
You’ll be able to see the filter used in the Reels at the bottom of your screen –
Here’s how Sam created a Reel by adding a filter called – Soft grain.
Step 4
The next tool here is the Timer. With this, you can easily record videos hands-free.
The slider will help you to select how long you want the clip to be.
You could record just a couple of seconds, 15 seconds or even 30 seconds.
Once you’ve selected the length of your clip, tap on the Set Timer option and you’re done!
Step 5
When you press record with a timer on, you’ll see a 3-second countdown before the recording starts, allowing you time to get into position.
The recording will pause right after the selected duration ends. Once you’ve recorded one clip, you’ll see another tool appear at the bottom of the toolbar. This one is called Align.
This tool will show you a still from your previous clip overlaid on your screen helping you ensure that your transitions are seamless. This way, you can keep recording clips until you’ve reached the time limit.
Also, when you record a new clip, you can change the speed and effects if you like.
But, if you decide to change the song you’ve selected after recording a clip or 2, it will replace the song you originally selected.
When you’re done recording, all you have to do is tap the arrow at the bottom right corner to see a preview of your Reel.
Step 6
You can now add stickers, drawings and text to your reel or download it to your device.
In this step, you can use the slider at the bottom to edit when you want the text to pop up. I mean how cool is that? 😎
Instagram also launched new fonts that you can use for your Reels.
Here’s Carla Dennis’s Reel with fonts –
Step 7
This is the last step and is all about publishing the content you’ve created.
Once you preview the video, you can go ahead and add a caption for your Reel, Tag people, add a geotag/ location, etc.
Once done, you can tap the image on the left, you’d be able to select a cover frame for your reel.
For this, you can use the slider at the bottom to select a still from your video, or tap Add from Camera Roll to upload a different image to use as the cover and then tap Done.
The ‘Share to Feed’ option remains enabled, but if you want your Reel to be posted to only the Reels section of your profile and not to your feed, all you’d have to do is disable this option by tapping the toggle button.
When it’s all ready and you’ve decided to publish the Reel, you can tap on the “Share” option at the bottom.
In case you’re not ready to share it yet, you can save it as a draft and always come back to editing it from where you left.
Bonus
Instagram Reels have four new features recently added Touch up, Voice over, Remix and Video Layout.
- Touch up- This feature auto-adds a filter to touch up the aesthetics of your video clip.
- Voice over- You can add a voice-over by lowering the music volume and adding a recorded voice file.
- Remix- This feature allows any user to create a reel in which their video and yours can be played side by side. You can read more about this newest feature here
- Video Layout- The feature allows you to create a layout for your Reels in a way that you can record 3 different clips on one single screen.
That’s all folks!
And if you’re not sure what to create, you can look at these 11 Instagram Reels content ideas
Let’s go create Reels? 💪
With Crowdfire, you can find curated content, schedule your posts, engage with your audience, deep-dive into analytics and create custom reports. Try it for free.
5 comments